Teaching about Waterbirth has become one of my favourite topics in recent years. As waterbirth has many benefits and few downsides it is a popular choice among birthing families in the UK.
Teaching about waterbirth in your antenatal preparation classes:
Paperchase – benefits for mother, father, baby, midwife
Split the group into 4 groups. Each group gets one piece of flipchart paper. Four headings: mother/birthing person, father/partner, baby/babies, midwife. Each group brainstorms the benefits/advantages of waterbirth for their person. Move along to the next chart after 1 minute, fill in that chart. Keep going until each group had a minute for each chart. Share the findings in the big group afterwards. This activity takes around 10-15 minutes.
Dry run with inflatable pool
A great way to teach about waterbirth is to do a dry run with an inflatable pool. I usually have the partners set up the pool and time it how long it takes to inflate the pool, add the cover etc. Meanwhile the birthing mothers/people explore some pictures of different pool birth environments and positions in the pool. Once the pool is set up, we discuss how long it may take to fill the pool, along with some things that they may need. Every family can then try out the pool to get a feel for the size. Be careful, when trying out positions as the empty pool will tip over if someone leans over the edge. Always position yourself or someone else at the opposite end to keep the pool steady.
Brainstorm practicalities home vs hospital
This activity is suitable for big group or some smaller groups. You’ll need a piece of flipchart paper for each group. Divide each paper into two sections. Have families compare the practicalities of waterbirth at home vs the hospital or maternity unit.
Pictures – why did you pick…
I lay out a selection of photos and positions cards. Including photos of equipment families may need/choose for their waterbirth. I ask each person/family (depending on group size) to pick one picture. Then in the large group we share: Why have you chosen the picture, what can we see in the picture, how does the picture make you feel, any questions about the image…. I usually do this as an icebreaker as an information leveller…
10 ways for partners to support breastfeeding. You are a new parent and your partner is breastfeeding/nursing/chestfeeding your baby or they are planning to. During antenatal classes I often get ask how partners, dads, friends and family members can support the breastfeeding/nursing/chestfeeding mother/parent.
Knowledge – Learn about breastfeeding
The first step to support someone who is nursing is to have some [basic] knowledge about how it works. Put in some time and effort to learn about the physiology of breastfeeding/nursing/chestfeeding, then you’ll be the best support your partner can hope for. An interesting and fun to read book is Kate Evan’s “Food of Love” (amazon affiliate link). For further websites and books, please see the sources and further reading section at the bottom of this page.
Reassurance
Reassuring your partner that you are there for support, encouraging words and being positive about their progress, will help your partner on their breastfeeding/nursing/chestfeeding journey. Like with every new skill a person is learning, reassurance and praise are a great help!
Comfort
Your partner may be feeding your baby for quite some time. That there is a comfortable, relaxing space for them is important. Ideally help set up a nursing nest with cushions, snacks, remote control, a book, muslin squares, a drink! (hydration is important for the milk production and flow) etc… A lot of parents chose to have a little basket that they keep nearby when they are feeding their baby.
Reduce household chores
Help and support by reducing household chores. Take on more than your usual household chores and/or get help such as a doula, cleaner, dog walker… The more your partner can focus on feeding your baby the more successful the journey will be.
Get involved in your baby’s care in other ways
Other than feeding, your baby will need a lot more than that. Get involved in their care by playing with them, reading stories, bathtime, changing nappies, taking them for a walk, cuddles…. That way your partner will be able to find some time for themselves to recharge, have a shower etc. and you can bond with your baby also.
Know where to find further support
It is important to know where you can get further support. Many places in the UK run regular breastfeeding peer support groups in-person and online. It is a good idea to find out about them while your partner is still pregnant. Encourage your partner to go along to one or more while you are waiting for your baby to be born. You can also find lots of valuable support and information on the Breastfeeding Network’s website!
Massage
Offering a massage can be really helpful to encourage milk flow and increase comfort. The hormone oxytocin lets the milk flow. Not everyone is a fan of massages but if you are, it’s a great way to support the milk flow!
Food
Feeding the breastfeeding/nursing/chestfeeding mother/parent is feeding your baby. Ensuring that there are plenty of nutritious food and some treats available is key to comfort, milk production and a rewarding feeding experience. Top tip: food that can be eaten with one hand and without cutlery is the most practical while feeding a baby. A pizza cutter, to cut any food can be helpful, as you can operate it with just one hand!
Privacy
Too many visitors in the first few weeks as a new parent can negatively influence the baby feeding experience. Help by keeping visitors to a bare minimum or inviting them for after breastfeeding/nursing/chestfeeding is established.
Other/older children
If you have older children, look after them while your baby is being fed. It can be incredibly helpful to be able to just focus on feeding your baby without having to worry about the wellbeing of the older siblings.
5 must-haves for every antenatal educator include visual and tactile learning aids to encourage active engagement and participation and promote the retention of information.
Pelvis model
A pelvis model to explain the mechanics of childbirth and explore beneficial positions for labour and birth. I like to pass the pelvis model round in the class. Asking parents to point out things they notice and why they might find that upright positions can be helpful for the birthing process.
Uterus model
A uterus model to explain how the uterus works. A knitted uterus and a soft ball works really well for this, however some educators also use a balloon and ping pong ball. The soft ball I use is one like this (amazon affiliate link!).
Placenta model
A placenta model to explain how the placenta works and what happens during the third stage of labour. It is also a useful discussion prompt for what to do with your placenta after the birth.
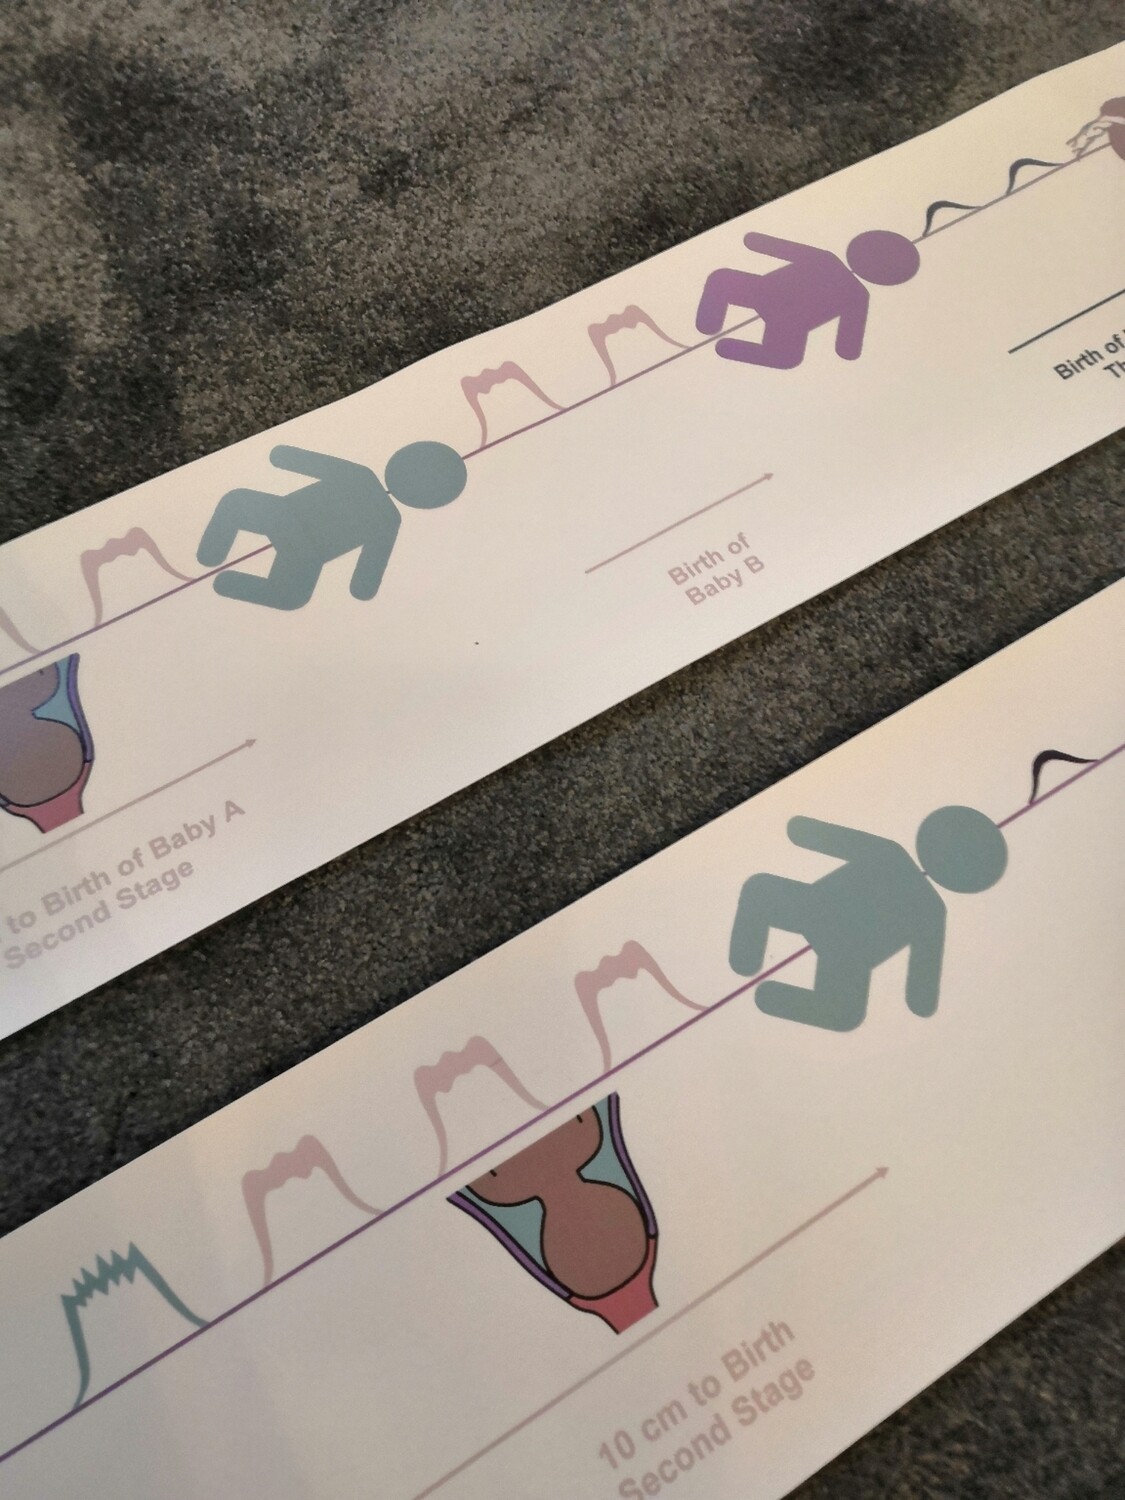
Childbirth Timeline
A timeline of labour to explore what happens when and how to support the birth process. You can either use a timeline banner, a beadline or create your own. These also work really well to explore induction and augmentation of labour, the birth partner’s role etc. I tend to use more than one type of timeline to help stress that every labour and birth experience is unique! See my other blogpost for teaching ideas using your labour and birth timelines. To create your own childbirth timelines, I have seen birthworkers draw one on the back of a roll of wallpaper and I have also seen some very impressive and intricate work in fabric! If you have made your own timelines, please share your pictures! I’d love to see yours!
The Birth Bag – Teaching ideas for your antenatal classes. As a birth worker, doula, midwife, student midwife or perinatal educator we aim to prepare expectant parents for their birth experience. Part of their birth experience is packing their birth bag aka hospital bag.
Birth Bag – Teaching Ideas for in-person Antenatal Classes
Show and tell
Simply ask every family to bring in up to 3 items each for their birth bag to the next class. During the “show and tell” ask them to share their item and why they chose it.
Brainstorm
Split the class into similar-sized groups. If I am facilitating classes for couples, I split into two/four groups separating birthing mothers/parents from their birth partners. I ask them to write down and/or draw items they’d like to take with them for the birth. Then we have a list for birthing mothers and folks as well as a separate list for birth partners! If you prefer not to use paper and pens or would like to use this as a homework or pre-course task, you could use mentimeter (see above) instead.
Paperchase
Do a paperchase. Split the group into three groups. Have three sets of flipchart paper & pens available. I like to draw the outline of a suitcase on mine and add a header i.e. birthing mother/parent, birth partner or baby. Each group will brainstorm for their sheet for x minutes (I give them 2 minutes). Then they move on to the next one and add to it for two minutes and then move again to the last one.
Birth Bag – Teaching Ideas for Virtual Antenatal Classes
Hospital Bag / Birth bag Scavenger hunt
A good old scavenger hunt to explore possible contents of a birth bag! This not only helps your clients think about what they need and what they would like, but also gets them off their seats/butts during a virtual antenatal course! I like to include this as part of the break. Mainly to encourage clients to move… To do so I share my screen with a short list of things which may be useful for their birth experience. I ask my clients to grab a drink, snack and go to the toilet and bring as many things as possible back to the screen within 15 minutes.
You can find my very long birth bag list in one of my other blog posts. Select a few items from this list or write your own short list!
Wordsearch
To create a birth bag wordsearch is another way of creating some engagement during your online classes. I create my wordsearches on my husband’s website. I integrate my wordsearch into my powerpoint slides and ask parents-to-be to annotate the slides with their findings.
Wordsearch a teaching idea for virtual antenatal classes
We then discuss what they would add/remove from their birth bag.
Quick competition – show and tell
Similar to the scavenger hunt, I like to integrate this as part of one of my clients’ breaks. It is way too easy to just stay sat where you are while you are on an online course or workshop, so this is another teaching idea to get your clients moving and engaged in the topic!
I like to ask every couple/client/expecting family to think about what they may need during the birth of their baby or babies. Each participants gets ask to bring back 3 items to the screen. Three items per person, items which may be helpful to themselves, NOT their partner.
This is often the first time when birth partners realise, that they need to look after themselves, too and may need some comfort items.
Wordcloud
Set up a wordcloud on mentimeter and ask your clients to add their preferred items/essentials to the list. A very engaging, fun and visual way to create a birth bag/hospital bag list with your clients. It’s anonymous and fun! You can save the results as a picture or pdf afterwards and send them out as a reminder/handout.
an example of mentimeter wordcloud results
How do you facilitate the topic of birth bags during your childbirth preparation classes? Please comment with your ideas or share them in an email with me!
Clothes checklist for your summer baby. You are having a baby this summer? Congratulations! You are wondering how many and what types of clothes and layering you might need?
When purchasing your baby clothes, make certain that they all are machine washable, non-flammable and made from soft comfortable materials. Choose clothes which open at the front or have wide/enveloped neck openings. This will make it easier for you to do frequent nappy changes!
The layette checklist below should be taken as a minimum and guide only. You may wish to have a few more spares of each item if you can afford to purchase more. Please also check out the guidance from BASIS and the Lullaby Trust.
Clothes checklist for your summer baby
4 body suits/sleepsuits/babygrows
4 vests (check for a wide neck opening) – you may wish to choose long-sleeved ones
2 cardigans or jackets
4 wide-necked cotton t-shirts or dresses
4 pairs of trousers, tights, shorts or skirts
1 summer hat
2 pairs of socks
1 baby blanket
In addition to the layette (set of clothing) your baby will also need nappies (either reusable or single-use) and you’ll want to make sure you have plenty of muslin squares! These are very handy to protect your clothing, mop up sick or clean up other bits and bobs. Muslin squares are also very handy to have as emergency nappy or breast pads 😉
How to use your childbirth/labour timeline banner?
If you are working in a group setting, I recommend you use the large childbirth/labour timeline banner and for 1:1 work, I recommend the smaller ones and/or beadlines. You can use and adapt any of the activities below to suit a group or 1:1 setting as well as work with the labour/childbirth timeline banners and or beadlines.
To explore how childbirth might unfold
In a group or one-to-one setting or a 1:1 reveal the timeline bit by bit. Starting at the beginning of the birthing journey. You may wish to point out which changes take place internally. How the cervix softens & dilates and how the baby moves. A great visual add-on for this activity are my birth process cards which are also available digitally for you to print your own.
exploring physiological birth with the childbirth timeline banner
To explore and add comfort measures along the line
Explore different options of medical/pharmaceutical and non-medical comfort measures. While exploring the options, pros and cons you could add when each of the options might be offered or commonly used. i.e. “When is too early or late for an epidural?” I like to use little props like the duck for “water or birthing pool” along with my “Pain Management – Sort it Out!” activity (digital product to print your own).
Labour timeline banner – exploring comfort measures
To explore induction and augmentation options
Similar to the comfort measures, the timeline is an excellent tool to explore which methods of induction and augmentation of labour are available locally and when along the timeline they may be offered. I like to use my induction discussion prompt cards and some props for that!
exploring options and timeline of augmentation and induction of labour using the labour/childbirth timeline banner
To explore the role of the birth partner along the timeline
Exploring the role of the birth partner as one of the guardians of oxytocin is an important part of many antenatal classes. Perinatal educators can use the childbirth timeline banner to help birth partners to explore their role, when they might be doing what. I like to hand out little sticky notes and a pen to everyone and then ask them to write down or draw what they might be doing when.
To explore your birth place and birth environment options along the timeline
Usually, while birth partners are exploring their role, I ask the birthing mothers/parents to explore their birth place and birth environment. I give them some questions to think about. i.e. Whereabouts will you be during early labour, established labour etc. How can you make your birthing space the most comfortable for you? Who is going to be there with you? This can then lead nicely to what they might wish to pack in their birth bag and where they might wish to give birth (home, hospital, midwife-led unit) and to think about their birth plan or preferences.
To explore how you might be feeling along the timeline
Exploring the feelings during childbirth. How might the birthing mother/parent be feeling? How does the birth partner feel? And how might the baby feel at that moment? I like to split the group into three smaller groups at that stage. Along with a different coloured set of sticky notes for each group. One colour each for baby, birthing parent and birth partner. Write down or draw faces of how they might be feeling, stick them to the banner along the timeline.
positions for childbirth cards used along the labour/childbirth timeline banner
To explore hypnobirthing techniques along the timeline
I simply ask expectant parents: “Which hypnobirthing technique or track is most helpful when?” They each get a card or piece of paper with a technique or they get a copy of a script. I then ask them “When would you use that?” each person/couple/family places their item along the timeline one at a time.
To explore breathing techniques along the timeline
Similar to most of the other ideas above, I have some printed out cards and ask parents-to-be to place them along the labour/childbirth timeline banner. Exploring which breathing techniques they may find helpful at different stages of their birthing journey.
To explore massage techniques along the timeline
Again, very similar as above my clients will also explore different massage techniques during my workshops. We will try them out together and explore which ones may be most helpful or comfortable for them during labour. Pictured here are my massage technique cards these are also available as a digital download as well as a set of worksheets (digital download).
exploring massage techniques for childbirth
Exploring the golden hour of childbirth
Finally, when exploring the third stage of labour (birth of the placenta) we also explore the golden hour, skin-to-skin etc including why this is helpful for the birth of the placenta, bonding with your baby, initiating breastfeeding and much more. For this exercise I use my placenta photo set (where appropriate and agreed with the group) as well as some of my newborn appearance card set (also available as digital download) pictures of skin-to-skin etc.
exploring the golden hour of childbirth
To create a labour/childbirth beadline, please join me for a labour beadline workshop or do my self-paced online course!
Halloween craft activities for you with your newborn! Since your newborn baby is probably a bit young for trick and treat here are some craft ideas instead!
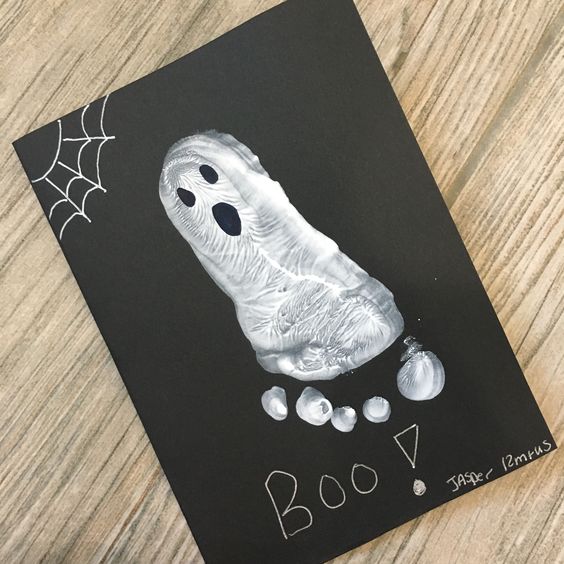
Ghost baby footprint
Halloween crafts for/with your newborn baby
Use hand and/or footprints for Halloween crafts. This will not only provide some great fun and decoration for your home, but also become a great keepsake! You could create the same image every year to see how much your little-ones hands and feet have grown.
Top tips for hand and footprints with babies:
If you baby is old enough to safely sit in a highchair, have them sit in a highchair to get safe and less messy access to their feet
If your baby is too young to be able to sit in a highchair, either do their footprints when they are asleep or have a friend or family member helping.
Use water based paints and check the lable to see if they’ll wash out or might stain
It is easier to get a successful handprint from your baby when they are a little older. Newborn babies tend to have the hands tightly closed into a fist a lot of the time. Best bet of newborn handprints is when they are fast asleep!
Here are some images of Halloween craft activities for your newborn:
I have created a pinterest board with some more hand and footprint halloween ideas for you and your baby!
You are going to be a birth partner? Here are some Birth Partner Do’s and Don’ts! Well do’s really. You’ll get the don’ts from looking at them!
To be a supportive, confident and well-informed birth partner try the following:
Attending childbirth preparation classes with your partner will help with your understanding of what is going on and what she is talking about. There is also some new vocabulary you may wish to learn.
Be available by phone, especially closer to the due date.
Have your own hospital or homebirth bag including: change of clothes, swimming trunks to wear in the birthing pool, your own drinks and snacks (please don’t drink/eat hers!) and maybe some comfortable shoes or slippers.
Make sure you know how to fit the car seat and keep it in the car.
Be familiar with the route to the hospital or birth unit and that your car is filled up with petrol regularly.
Make sure you know where her maternity notes are.
Discuss who to tell and when to tell them that your baby was born. Make a list of contact details.
Make sure your camera is charged and the memory card is empty or a new film is in it – maybe have it ready in your bag!
Support your partner where you can and try to take over some tasks like shopping, cooking, laundry, cleaning to give her some time to rest before and after the birth of you baby.
Make sure that you know and understand your partner’s wishes in her birth plan and add your wishes, too. Or even better: write the birth plan together!
If this is not your first baby or you have pets, make sure you know who will look after the older one(s) / pets and how to contact them.
If it is not your first baby, wherever you can, take over looking after / entertaining the older one(s) to give mum a break before and after the birth.
To practice for labour and birth offer a massage and / or slow dance twice a week before the birth of your baby. Use these techniques during labour to make your partner more comfortable.
I hope you find these ideas useful. If you have already been a birth partner, share with us what worked for you and your partner. We’d love to know!
My Birth Preparation Course (online) is for Birth Partners, too!
Please also check out my online course! No videos, just text and images to learn in your own time. Includes hypnobirthing mp3s, scripts, workbook, handouts, infographics and much more! Lots and lots of information at your fingertips! Includes:
To be perfectly honest, just like many things when it comes to birthing your baby and raising your children, it is a lot of trial and error. There is no one-fix or quick-fix solution. Every baby and baby-parent relationship are unique. Your journey is unique.
The following suggestions on how to introduce bottle-feeding to your breast-fed baby, come from years of experience of working with new parents.
When to start introducing a bottle to my breast-fed baby?
Depending on why you are planning on introducing a bottle and whether you wish to continue to breast-feed or mixed-feed, timing is up to you. Some parents have to stop breastfeeding before they wanted to due to medical reasons, or because they are going to be away from their baby. Others choose to stop completely or to start mixed-feeding as their personal preference. Anything is possible. There is no one best time to start as again, you, your family and circumstances are unique.
How to start introducing a bottle to my breast-fed baby?
Choose a day when your partner or primary support person will be available
Your baby may accept a bottle more easily from someone other than you / the breastfeeding mother or person. They know their milk comes from you and may not understand why it is now offered from this new object (the bottle).
Choose a time when your baby is settled and patient.
An settled baby is usually more receptive of changes and new things
Offer the bottle about 1 hour after a breastfeed at first. Start with a small amount of breastmilk or formula milk such as 1/2 ounce.
Offer the milk at the “right” temperature.
Breastfed babies are used to drinking their milk at a body temperature of approximately 37 degrees Celsius. They can be a little more particular about the milk temperature. Warm up refrigerated milk in a bowl of warm water, in a bottle warmer or under warm running water. Cool down freshly prepared formula milk in a bowl of cold water or under cold running water.
Leave the room/house
Sometimes it may be necessary for the breastfeeding mother or parent to leave the room or even the house, so that your baby cannot smell your milk.
Be patient
Tickle your babies upper lip with the bottle teat, letting your baby “latch on” to it like they would to your breast. If they get upset and haven’t eaten anything after 10 minutes, stop and try again later or the next day. Responsive bottle-feeding or paced bottle-feeding
Bond with your baby
Talk to them, look them in the eyes. Skin-to-skin when introducing a bottle can help, too. Skin-to-skin contact helps your baby to relax and settle, while it’s stimulating their digestion and interest in feeding.
The teat and bottle
try different teats and bottles. You may be lucky that the first one you try works for you and your baby but if it isn’t there are many more…
short round teats with a wide base are believed to be the encourage a similar experience and movements to breastfeeding.
some babies gag on longer teats, therefore, shorter teats seem preferable.
warm the teat with warm water before feeding
Positions
Try different positions. Preferred positions for breastfeeding are often different than those preferred for bottle-feeding. Maybe try a facing out position, so your baby can look around the room. Sometimes walking around the room while feeding can help, too.
Try feeding from a spoon, sippy cup, doidycup or small open cup
If you don’t wish to use a bottle or you’ve tried everything and it hasn’t worked out for you and your baby, you may try feeding the baby with a spoon, sippy cup, doidycup (baby/toddler training cup) or small open cup. Hold the baby in your lap in an upright, supported position. Bring the spoon or cup to the baby’s mouth and allow the baby to take the milk herself by just touching the milk in the spoon or cup to the baby’s upper lip. Let the baby set the pace. Be very careful to not dump the milk into the baby’s mouth to avoid choking.
Responsive bottle-feeding or paced bottle-feeding
For any parent who chooses to feed their baby with a bottle, responsive or paced bottle-feeding is the current recommendation by the NHS (at the time of writing this in 2022).
Recognize feeding cues. Feed your baby when they are showing signs of hunger.
Hold baby close, in a semi-upright position during feeds.
Tickle your baby’s nose with the teat to encourage them to open their mouth wide. Keep the bottle in a horizontal position.
Watch your baby and follow the cues for when they need a break.
Your baby will know how much milk they need. Follow their lead.
Responsive Bottle-feeding or paced bottle-feeding
Responsive Bottle-feeding or paced bottle-feeding – a visual guide
DiSantis KI, Hodges EA, Johnson SL, Fisher JO. (2011) The role of responsive feeding in overweight during infancy and toddlerhood: a systematic review. International Journal of Obesity. 35:480-492.
Icebreakers for antenatal classes. Break the ice, bond the group. Create lifelong friendships!
Facilitating successful group antenatal and parenting classes in a group setting requires icebreakers. Icebreakers help the participants to engage in the content, get to know the facilitator and other participants as well as building a bond as a group.
I’d start off with an icebreaker which goes round the room/group fairly early on as research shows that once everyone has said one thing in the group early on they are more likely to ask questions and join in later on.
Icebreakers can be really simple, like asking a question to the group and ask each participant [to state their name] to give their response to the question/statement.
Some ideas for icebreakers/questions (choose one per activity/session/round only) for your antenatal classes:
One thing I already know about my/our baby…
My biggest question about becoming a parent/family/mother/father is…
As a new parent I look forward to…
My greatest fear about being a parent is…
As a new parent I do not look forward to…
One quality I would like my child to have is…
One thing I have done/changed because of having a baby is…
As a new parent I hope I can…
One thing I would like to achieve during my/our baby’s first week at home is…
Becoming a family/father/mother/parent means to me…
One person, I would like my/our baby to meet is…
When I need support, I can turn to…
One thing I’ll gain as a new parent is…
One thing I’ll lose as a new parent is…
My/our baby will sleep in…
When I hear the word ‘breastfeeding’ it makes me think…
If I had an extra hour a day when everyone still has 24hrs a day, I will do… in my extra hour.
When I see a mother/parent/father/person breastfeeding I feel/think…
When I see a mother/parent/father/person bottle feeding I feel/think…
When I need advice I’ll ask/go to…
When I think about parental leave, I feel…
When I think about returning to work, I feel…
Allow each participant to give their response without commenting on it. These types of icebreaker questions can be used to encourage dialogue and interest in topics that you may not have covered during the course but can also aid revision and group bonding. You can download the questions/statements above as a printable A4 sheet here.
Goodie bag activity– have a goodie bag full of items (one item per participant or couple) i.e. birth bag items, nappy bag items, post-partum recovery items. Ask each participant/couple to pick one [random] item. When everyone has one item, go round and ask the ‘owner’ to comment on the item. What might it be used for? What is it?…
People bingo – each participant has a “People Bingo” Card and has to go round and talk to other participants to find people matching the statement. Statements could be: Has a red car. Doesn’t drink tea. Is left-handed…
Scavenger hunt – when facilitating online, I often use a scavenger hunt. I put a list of items on the screen, usually related to a topic such as the birth bag and ask participants to find as many of the listed items as they can. This activity usually creates lots of laughter and gets people moving instead of sitting in front of a screen!
Chlup, D. T., & Collins, T. E. (2010). Breaking the Ice: Using Ice-breakers and Re-energizers with Adult Learners. Adult Learning, 21(3–4), 34–39. https://doi.org/10.1177/104515951002100305
S. Gillet, K. Winkle, G. Belgiovine and I. Leite, “Ice-Breakers, Turn-Takers and Fun-Makers: Exploring Robots for Groups with Teenagers,” 2022 31st IEEE International Conference on Robot and Human Interactive Communication (RO-MAN), Napoli, Italy, 2022, pp. 1474-1481, doi: 10.1109/RO-MAN53752.2022.9900644.
Pearce Eiluned,Launay Jacques and Dunbar Robin I. M. 2015 The ice-breaker effect: singing mediates fast social bonding R. Soc. Open sci.2150221150221 http://doi.org/10.1098/rsos.1
Disclaimer
The information, resources, and materials provided on this website, including all digital and physical products, are for educational and informational purposes only. They are not intended to replace professional medical advice, diagnosis, or treatment.
While every effort is made to ensure that the information and images presented are accurate and up to date, they reflect personal interpretation and understanding. As such, they may not always be complete, precise, or applicable to every individual situation.
Always seek the advice of a qualified healthcare professional regarding any medical concerns or decisions. Do not disregard or delay seeking professional advice based on information found within these materials.