Posted on 1 Comment

Teaching about pregnancy anatomy

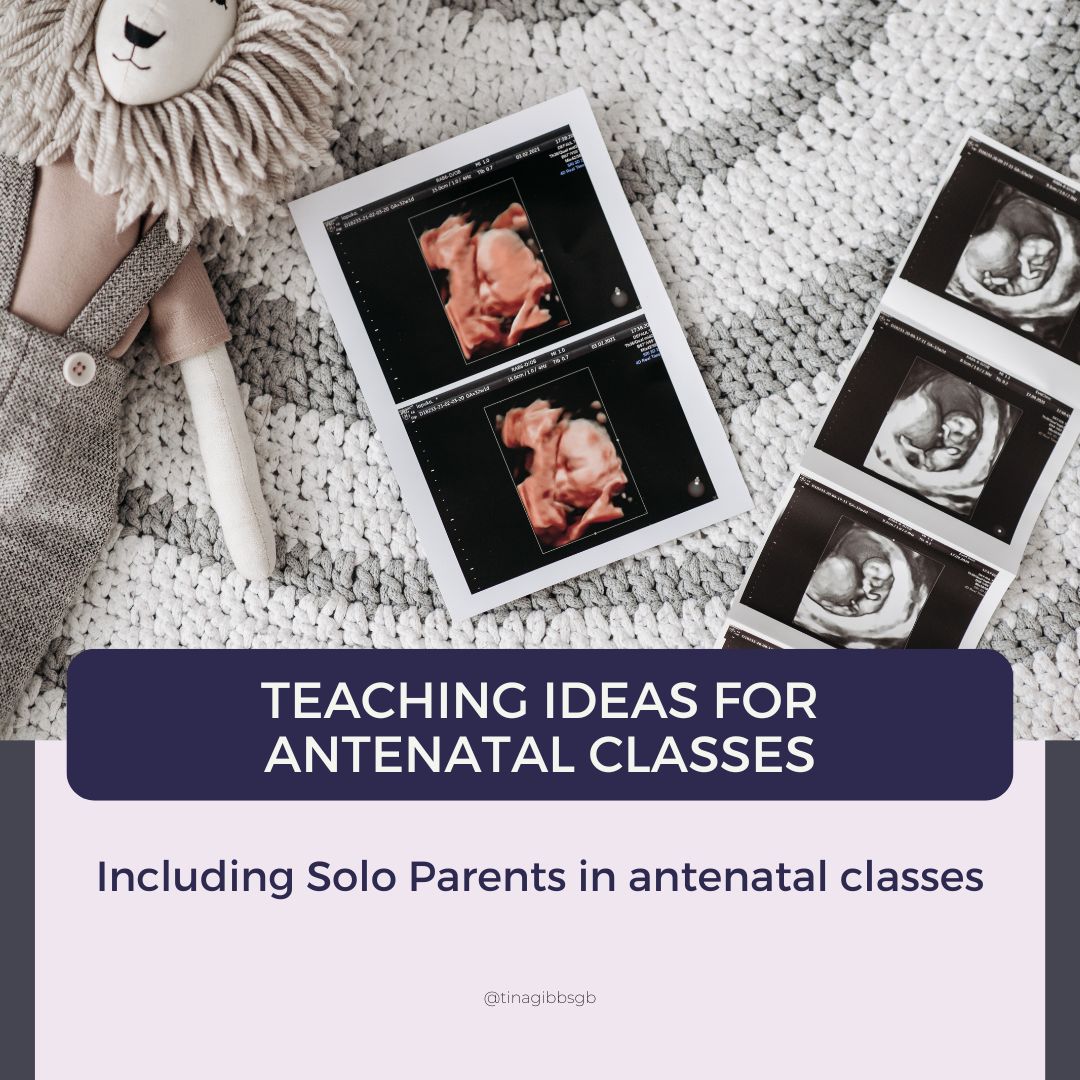
Teaching about pregnancy anatomy in an antenatal setting. One of the first topics I cover during my childbirth preparation classes is “pregnancy vocabulary”.

Pregnancy vocabulary

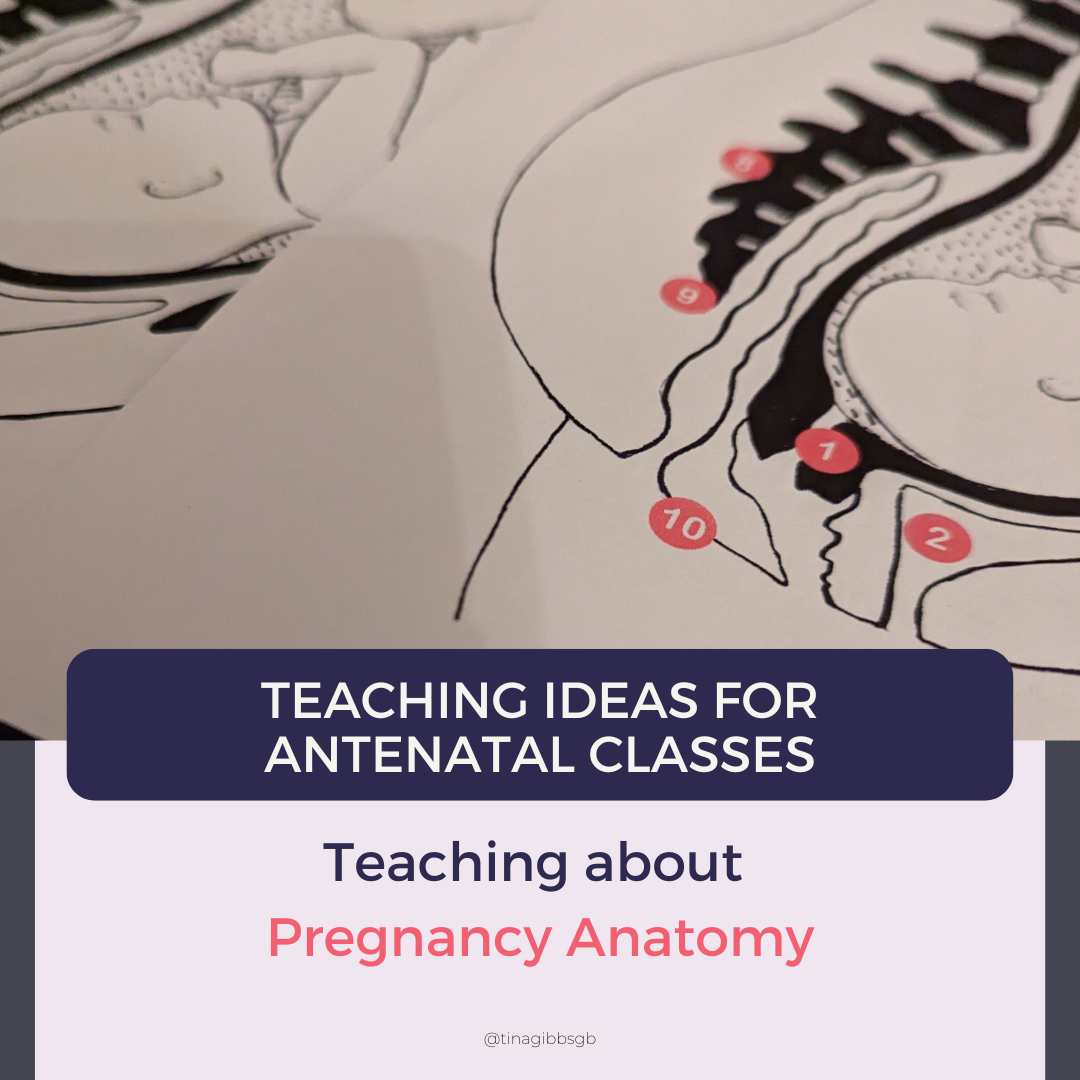
During an in-person group setting, I often split up the group into two “teams”. Each team will have an A2 poster of either the pre-pregnancy cross section or the pregnant cross-section body and body part labels such as “coccyx”, “uterus/womb”, “sacrum”, “vagina”, “cervix” etc… I explain that these words they are likely to hear during their journey into parenthood and that we will be referring to some of them during the rest of the course. I give them 5-10 minutes to add the labels to their poster (i use laminated cards with blu tack or similar on my PVC posters).

You can download the body part labels for free here:

Pregnancy anatomy changes

Once they are done, we bring the group back together, including their posters and we have a look and compare the pregnancy anatomy images. We have a discussion about common pregnancy discomforts, where they are coming from and how to avoid or minimize them.

During a 1:1 in-person setting, I use either both posters together or my new pregnancy anatomy comparison poster, where all three images are on one poster.

During an online setting I use my pregnancy vocabulary animated slide which is part of my Antenatal Course PowerPoint Slides.

Pregnancy Vocabulary and anatomy PowerPoint Slide

The image above is also part of my antenatal class journals, which I give out in class. I have recently created a downloadable worksheet on that topic, too. Recently, I found that parents-to-be like to take home paper handouts again. They especially rate my worksheets where they are encouraged to colour-in images and take notes. All these things help them focus and retain the information.

Pre-pregnancy vs pregnant body comparison worksheets

I have not had an opportunity to use my new pre-pregnancy vs pregnant body worksheets yet, but I am certainly looking forward to using these beauties! They are available in three skin tones as well as the colouring in version. With and without annotations or lines. So they’d work as handouts, too! I am really excited about these!

These printable pregnancy anatomy handouts are now also available from my TpT store and are included in my BARGAIN growing bundle!

Posted on 1 Comment

6 ways to include solo parents in antenatal classes

include solo parents in antenatal classes

When you’re used to facilitating your antenatal classes for couples, you might find solo parents attending daunting. So here are 6 ways or ideas on how to include solo parents in your antenatal classes.

Language

Watch your language. Take the solo parent’s lead. How do they introduce themselves to you and the group. Are they calling themselves single parent, sole parent, solo parent…? Mirror that language.

Self massage

It is always a good idea to facilitate and teach about self-massage and self-hypnosis. Here are some self-massage techniques…

Self-massage techniques to include solo parents in antenatal classes

Images

Include images of solo parents to your antenatal classes. Images of a single person in a labour and birth position, a mother or father holding their baby, etc. Check your visual aids to see if they include images of labouring people on their own. My positions for labour and birth poster as well as the cards include images of solo parents.

Storytelling

Include stories about solo parents you know (use their names with their consent only). You could say something like “A solo parent from a previous course found XYZ really helpful.”

Hypnobirthing

Hypnobirthing or self-hypnosis for birth is a very popular choice amongst solo parents. They regular practice of the techniques enables the birthing parent to be “in the zone” and focus on their body and baby.

Mindfulness

Just like hypnobirthing, mindfulness techniques have recently gained popularity especially with solo parents. The focus on the here and now, themselves, their body and their baby works wonders during labour and birth.

Inclusion of solo attendees as standard in your classes

Make the inclusion of solo parents to your antenatal classes something you do every time. Even if everyone in the room has a birthing partner, you never know if the birthing partner can make it to the birth. Explain to expectant parents, that there is like to be a time when the birthing mother/person/parent is on their own at least for a short time.

Posted on Leave a comment

Teaching about induction

Teaching about augmentation and induction of labour as part of childbirth education classes has become an essential topic. Expectant parents need to know the pros and cons, different options and reasons for the recommended induction of labour.

In my opinion, teaching about induction and augmentation of labour means to explore:

  • Common reasons for the recommendation, and why the recommendations are made, how important the reason is, what evidence there is to support the recommendation
  • Different options of for induction and augmentation, i.e. membrane sweep, drip, etc
  • Timeline of induction and augmentation of labour – what may be offered when and why
  • Options of “self-induction” – how can we encourage labour to start on its own?
  • Reputable sources of information to support informed decision-making (some are listed below)
  • Their Birthrights (Human Rights in Childbirth)
  • How to feel empowered once/if they’ve agreed to an induction (support, informed decision making, best for them and their baby in their individual situation…)
  • How to adapt their birth plan

Teaching about induction and augmentation of labour ideas

Discussion

Have a discussion in class about reasons, ways and pros and cons of inducing labour. My induction discussion prompt cards are a visual way to encourage expectant parents to discuss the topic. They are also available as ready printed version and both versions include full instructions including links and references.

Timeline

Explore what methods of induction and augmentation may be offered/happening when, using one of my labour timeline banners.

timeline banner - induction and augmentation of labour

Informed Decision Making Game

One of my personal favourites is an informed decision making scenario game. This also works for teaching about induction and augmentation of labour! The way it works is that you start off with one scenario and give two or more options. Let participants choose one of the options. Each option/choice develops the story further. You’ll get different outcomes when making different choices. Some are choices others are chance as you roll a die or two. This is a fun way to explore how different choices may impact your birth experience. This game works in a in-person class, virtual class as well as for homework.

I also offer workshops on how to write and build your own interactive informed decision making game!

Teaching about induction of labour using visuals

To help include all different learning styles and your clients’ preferences use a mixture of visuals, taktile interactions as well as the written word! I have a range of visual learning aids ready printed as well as digital downloads available from my shop.

Posters

I like to use posters and hang them up on the wall or in the windows during sessions. Posters support the information and retention during the course. I have created these beautiful posters on “self-induction” called “How to encourage childbirth/labour to start”. They are a very recent (2023) addition to my shop and classes and are very positively received by clients as well as birth workers!

Workbooks/Journals/Worksheets

I also provide my clients with a journal/workbook the workbook includes images and information about childbirth and infant feeding. They can take it home and recap and/or take notes during the workshop.

I can also create personalised workbooks, activities, posters and powerpoints for you to fit your branding and content preferences. Please get in touch!

Posted on Leave a comment

Teaching about Waterbirth

Teaching about Waterbirth Teaching ideas for birthworkers

Teaching about Waterbirth has become one of my favourite topics in recent years. As waterbirth has many benefits and few downsides it is a popular choice among birthing families in the UK.

Teaching about waterbirth in your antenatal preparation classes:

Paperchase – benefits for mother, father, baby, midwife

Split the group into 4 groups. Each group gets one piece of flipchart paper. Four headings: mother/birthing person, father/partner, baby/babies, midwife. Each group brainstorms the benefits/advantages of waterbirth for their person. Move along to the next chart after 1 minute, fill in that chart. Keep going until each group had a minute for each chart. Share the findings in the big group afterwards. This activity takes around 10-15 minutes.

Dry run with inflatable pool

A great way to teach about waterbirth is to do a dry run with an inflatable pool. I usually have the partners set up the pool and time it how long it takes to inflate the pool, add the cover etc. Meanwhile the birthing mothers/people explore some pictures of different pool birth environments and positions in the pool. Once the pool is set up, we discuss how long it may take to fill the pool, along with some things that they may need. Every family can then try out the pool to get a feel for the size. Be careful, when trying out positions as the empty pool will tip over if someone leans over the edge. Always position yourself or someone else at the opposite end to keep the pool steady.

Brainstorm practicalities home vs hospital

This activity is suitable for big group or some smaller groups. You’ll need a piece of flipchart paper for each group. Divide each paper into two sections. Have families compare the practicalities of waterbirth at home vs the hospital or maternity unit.

Pictures – why did you pick…

I lay out a selection of photos and positions cards. Including photos of equipment families may need/choose for their waterbirth. I ask each person/family (depending on group size) to pick one picture. Then in the large group we share: Why have you chosen the picture, what can we see in the picture, how does the picture make you feel, any questions about the image…. I usually do this as an icebreaker as an information leveller…

How to you teach about waterbirth? Please share your ideas with me!

Have you seen my waterbirth video collection? You can find that here!

Posted on Leave a comment

5 must-haves for every antenatal educator

5 must-haves for every antenatal educator include visual and tactile learning aids to encourage active engagement and participation and promote the retention of information.

Pelvis model

A pelvis model to explain the mechanics of childbirth and explore beneficial positions for labour and birth. I like to pass the pelvis model round in the class. Asking parents to point out things they notice and why they might find that upright positions can be helpful for the birthing process.

Uterus model

A uterus model to explain how the uterus works. A knitted uterus and a soft ball works really well for this, however some educators also use a balloon and ping pong ball. The soft ball I use is one like this (amazon affiliate link!).

Placenta model

A placenta model to explain how the placenta works and what happens during the third stage of labour. It is also a useful discussion prompt for what to do with your placenta after the birth.

Childbirth Timeline

A timeline of labour to explore what happens when and how to support the birth process. You can either use a timeline banner, a beadline or create your own. These also work really well to explore induction and augmentation of labour, the birth partner’s role etc. I tend to use more than one type of timeline to help stress that every labour and birth experience is unique! See my other blogpost for teaching ideas using your labour and birth timelines. To create your own childbirth timelines, I have seen birthworkers draw one on the back of a roll of wallpaper and I have also seen some very impressive and intricate work in fabric! If you have made your own timelines, please share your pictures! I’d love to see yours!

Positions for labour and childbirth images

Positions for labour & birth images. These could be either photos or drawings like my childbirth positions cards or it could be a poster.

These are my top 5 must-haves as a perinatal educator & doula. What are your top 5s you cannot facilitate without?

Posted on Leave a comment

Birth Bag – Teaching Ideas

The Birth Bag – Teaching ideas for your antenatal classes. As a birth worker, doula, midwife, student midwife or perinatal educator we aim to prepare expectant parents for their birth experience. Part of their birth experience is packing their birth bag aka hospital bag.

Birth Bag – Teaching Ideas for in-person Antenatal Classes

Show and tell

Simply ask every family to bring in up to 3 items each for their birth bag to the next class. During the “show and tell” ask them to share their item and why they chose it.

Brainstorm

Split the class into similar-sized groups. If I am facilitating classes for couples, I split into two/four groups separating birthing mothers/parents from their birth partners. I ask them to write down and/or draw items they’d like to take with them for the birth. Then we have a list for birthing mothers and folks as well as a separate list for birth partners! If you prefer not to use paper and pens or would like to use this as a homework or pre-course task, you could use mentimeter (see above) instead.

Paperchase

Do a paperchase. Split the group into three groups. Have three sets of flipchart paper & pens available. I like to draw the outline of a suitcase on mine and add a header i.e. birthing mother/parent, birth partner or baby. Each group will brainstorm for their sheet for x minutes (I give them 2 minutes). Then they move on to the next one and add to it for two minutes and then move again to the last one.

Birth Bag – Teaching Ideas for Virtual Antenatal Classes

Hospital Bag / Birth bag Scavenger hunt

A good old scavenger hunt to explore possible contents of a birth bag! This not only helps your clients think about what they need and what they would like, but also gets them off their seats/butts during a virtual antenatal course! I like to include this as part of the break. Mainly to encourage clients to move… To do so I share my screen with a short list of things which may be useful for their birth experience. I ask my clients to grab a drink, snack and go to the toilet and bring as many things as possible back to the screen within 15 minutes.

You can find my very long birth bag list in one of my other blog posts. Select a few items from this list or write your own short list!

birth bag - teaching ideas

Wordsearch

To create a birth bag wordsearch is another way of creating some engagement during your online classes. I create my wordsearches on my husband’s website. I integrate my wordsearch into my powerpoint slides and ask parents-to-be to annotate the slides with their findings.

birth bag teaching ideas virtual antenatal classes
Wordsearch a teaching idea for virtual antenatal classes

We then discuss what they would add/remove from their birth bag.

Quick competition – show and tell

Similar to the scavenger hunt, I like to integrate this as part of one of my clients’ breaks. It is way too easy to just stay sat where you are while you are on an online course or workshop, so this is another teaching idea to get your clients moving and engaged in the topic!

I like to ask every couple/client/expecting family to think about what they may need during the birth of their baby or babies. Each participants gets ask to bring back 3 items to the screen. Three items per person, items which may be helpful to themselves, NOT their partner.

This is often the first time when birth partners realise, that they need to look after themselves, too and may need some comfort items.

Wordcloud

Set up a wordcloud on mentimeter and ask your clients to add their preferred items/essentials to the list. A very engaging, fun and visual way to create a birth bag/hospital bag list with your clients. It’s anonymous and fun! You can save the results as a picture or pdf afterwards and send them out as a reminder/handout.

an example of mentimeter wordcloud results

How do you facilitate the topic of birth bags during your childbirth preparation classes? Please comment with your ideas or share them in an email with me!

Posted on

Teaching about breathing techniques for childbirth?

Most antenatal education formats virtual or in-person, include breathing techniques for childbirth. There are a range of different techniques used by different organizations or private facilitators.
Breathing techniques are well known for being helpful in stressful situations and to help people relax. 


Harvard Health Publishing says: “Relaxation techniques: Breath control helps quell errant stress response”. Therefore, breathing techniques may be an excellent option to help mothers and birthing people to stay calm and relaxed during labour and childbirth.

As birth workers we know it’s important, we know it works (when practised) and most parents-to-be have heard about it, too.  However, when I facilitate antenatal education classes, I often get eye-rolling from some parents-to-be when introducing the topic, especially when I ask parents-to-be to join in and give it a go. Therefore, I have come up with a fun activity, that parents-to-be can practise within their couple during the class and at home.

Fortune-Tellers/cootie catchers to practice for labour and birth! 

You can find my fortune tellers here:

You can print all of my activities on standard A4 paper. Every time I have used any of these fortune-tellers with pregnant parents and their birth partners, they were a great success! Parents enjoy playing with the fortune-tellers and reviving some childhood memories at the same time.

Come and visit my TPT store!

Posted on

What is a labour beadline?

A labour or childbirth beadline is such a lovely way to keep track of special moments! It’s a collection of often colourful beads strung together on a strong fishing line or similar thread. You can get creative by using different-sized beads to represent contractions and breaks; some folks even choose different colours or use both! I personally enjoy working with wooden beads, but really, any material can work beautifully. I love using shiny new beads along with pre-loved treasures from broken jewellery or charming finds from charity shops. #labourbeadline #labourbeadlines

Labour beadline for childbirth education

How do I use a labour beadline?

Labour beadlines are a fantastic way to create a visual and tactile learning aid of the stages of childbirth/labour! During an antenatal class or a doula 1:1 you might invite your participants to label the different stages and even chat about the variations they notice. Adding pictures of positions and self-help tools along the timeline can spark discussions about the best techniques to try at each stage.
For those teaching students who are visually impaired, using these beadlines serves as a wonderful tactile teaching aid in your classes. Just imagine how effective it can be to use different-sized beads to represent contractions versus breaks!

labour beadline childbirth education

​What do the beads mean? 

Each larger bead, or those of different colours, stands for a contraction. The smaller beads at the beginning stand for mild contractions and will appear in an irregular order initially. As we progress, the gaps or breaks between these beads will shorten, and the contractions will become stronger, shown by larger beads. Knots or specially shaped rigged beads symbolize the transition phase. A larger special bead, like a heart-shaped one, beautifully represents the birth of the baby, while a smaller special bead at the end stands for the placenta.

labour beadline childbirth education

When can I use a labour beadline?

A labour bead line is a wonderful resource for use in large groups, smaller gatherings, or one-on-one sessions. When working with larger groups, it can be advantageous to set up two or three labour bead lines, allowing parents-to-be to explore, interact with, and engage in hands-on learning. I’m pleased to share that most of my labour bead lines are designed with accessibility in mind, making them particularly suitable for visually impaired parents-to-be, as all the contraction beads are larger than the pause/break beads!

Where can I get a labour beadline?

You can absolutely create your own labour/childbirth beadline! It takes just 1-2 hours to design one, and if you prefer, you can also check out the ready-made options or even order a customized one from my website. We have a variety of lovely labour beadlines available for both singleton and multiple pregnancies. If making your own sounds like fun, I also offer…

  • labour beadline kits with everything you need to start beading!
  • Lesson plan how to incorporate your labour beadline or beaded childbirth timeline in your classes.
labour beadline kit childbirth education